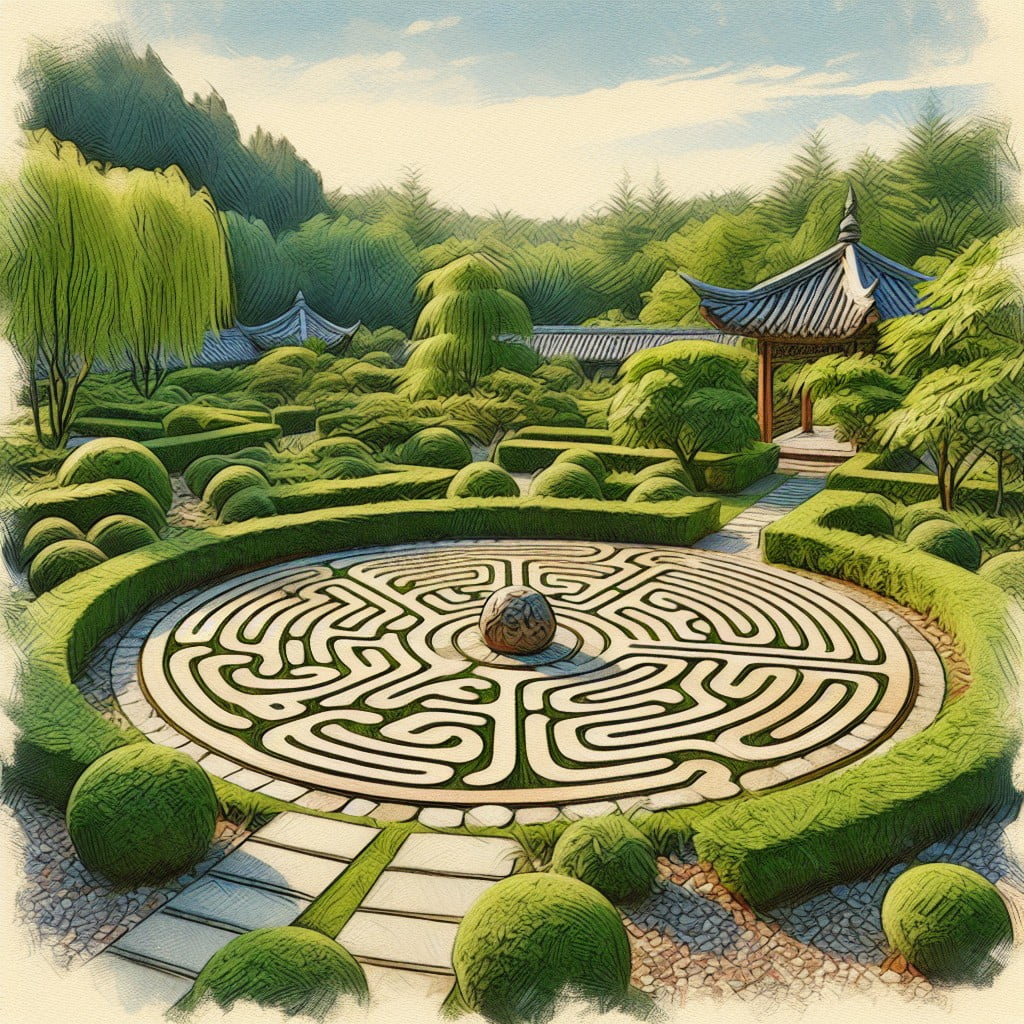
Embark on a journey into self-discovery by constructing a meditation labyrinth, because it opens a portal to inner peace and mindfulness unlike anything else.
Building a meditation labyrinth can be an enriching journey towards mindfulness and tranquility. This process involves careful planning, selection of the appropriate design, and meticulous execution.
Whether you wish to create a simple classical labyrinth or an intricate Chartres style, it’s all about crafting a sacred space that resonates with your meditative needs.
This guide will walk you through every step, offering comprehensive details on creating your own personal sanctuary for meditation.
From selecting the ideal location, choosing the right materials, to understanding the symbolic essence of each turn and twist in your labyrinth, you’ll find all the information you need here.
Let’s embark on this mindful journey together.
Key takeaways:
- Differentiate labyrinth from maze, symbolic of life’s journey.
- Select ideal location: tranquil, flat, spacious, private, consider natural elements.
- Gather necessary tools: measuring tape, stakes, mallet, marking spray or chalk, twine or cord, path material.
- Design and scale labyrinth: choose shape, determine size, sketch plan.
- Follow step-by-step instructions for marking and constructing labyrinth.
Understanding the Concept of a Labyrinth

To fully grasp the idea of a labyrinth, it’s vital to differentiate it from a maze. While a maze offers numerous confusing paths and dead ends, a labyrinth provides a single, clear route to follow with no room for choices, decisions, or errors. To many, the pathway is symbolic of life’s journey, bringing an element of spiritual introspection.
Meditation labyrinths, in particular, serve as a physical representation of mindfulness practices. They encourage us to lose ourselves in the rhythmic pace of each intertwining step, embracing the quiet solitude of introspection. Ever unfolding, yet entirely contained, these structures allow us to engage with our inner selves in a serene setting.
In constructing your labyrinth, the choice of shape—traditional circular or modern geometrical—will influence the nature of the journey. Regular intervals and spaces between paths help maintain a smooth progression. Ultimately, the labyrinth’s design reflects our desire for balance, harmony, and mindful contemplation.
Choosing the Perfect Site for Your Labyrinth
When deciding on a space for your labyrinth, consider the surrounding environment. Tranquility is key – a serene space promotes deep meditation.
The terrain is another aspect to ponder; a relatively flat surface is ideal for easier construction and navigation.
Size is also crucial. A larger area will provide a more spacious path, potentially increasing the duration of the mindful journey.
Privacy should also factor into your consideration. The labyrinth should be a sanctuary, free from disturbances.
Lastly, consider natural elements such as sun, shade, and wind. These elements can greatly influence the ambiance of your labyrinth and your meditative experience within.
Detailed Tools and Materials List for Building a Labyrinth
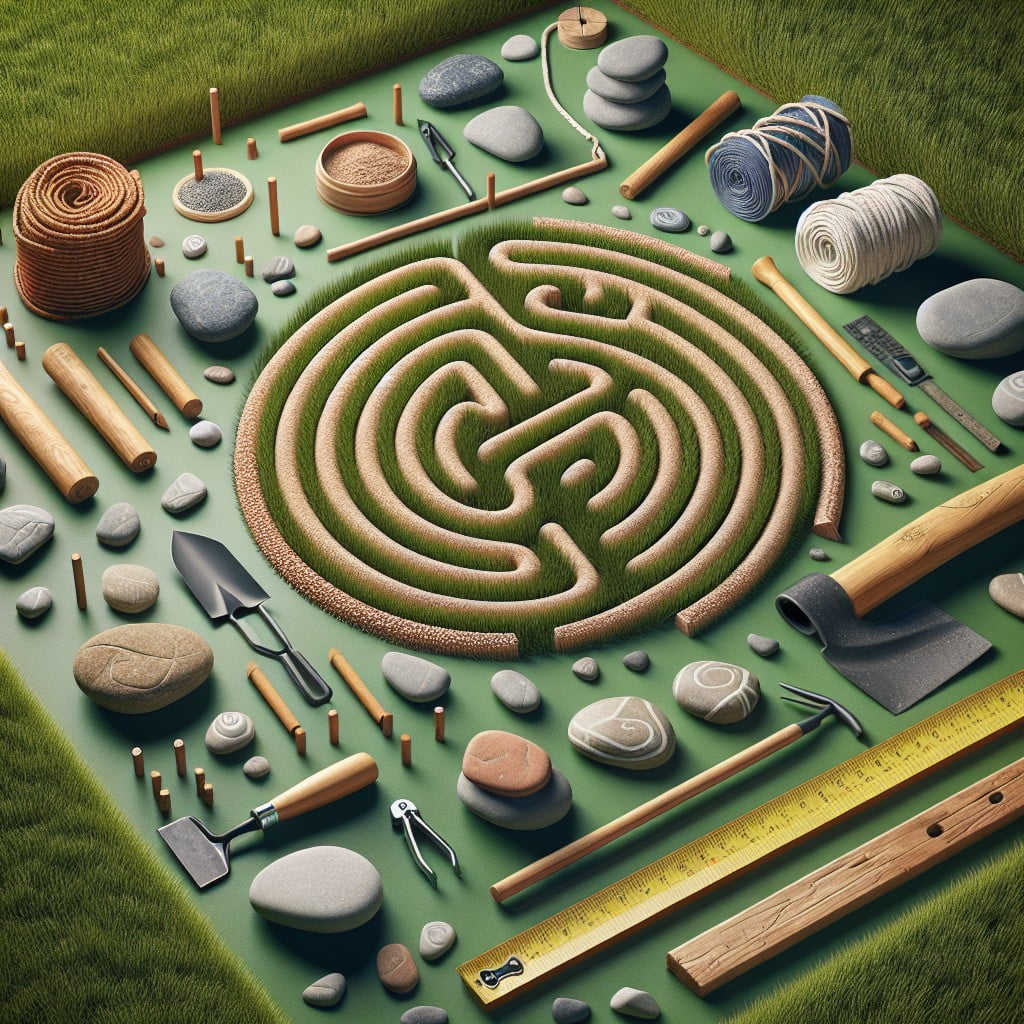
Before diving into the project, make sure you have the necessary tools and materials on hand. A long measuring tape and stakes are vital to ensure accurate dimensions. A mallet will be needed to drive these stakes into the ground.
Use marking spray or chalk to define your spaces and lines. Twine or cord is required to form the grid and guide your layout. Lastly, consider the material you wish to mark your path with. This could range from natural options like sand or gravel, to manufactured materials such as paving stones or concrete.
Make sure your chosen material fits the aesthetic you intend to create in your peaceful space. Remember, the goal is to craft an environment that promotes calm and focus.
How to Design and Scale Your Meditation Labyrinth
Planning your labyrinth involves handing attention to both design and scale. The first step pivots on choosing the shape – classical or medieval. A classical labyrinth lays out seven circuits across four quadrants, while a medieval design offers a more complex path of eleven circuits arranged in a rosette shape.
Deciding the scale plays an equal importance. Size it for personal use or to accommodate a group. Account for plenty of space around the labyrinth to ensure tranquility. As a benchmark, an 18-foot diameter for a classical labyrinth or a minimum of 50-foot diameter for a medieval labyrinth suffices for personal use.
Sketch a bird’s-eye view to serve as your master plan, noting all the turns and circuits. Pre-calculated labyrinth designs and dimensions are available online to guide you. Remember, the size is not set in stone; adjust it to fit your space and aesthetics.
The corridor or the path width should also be determined. For a comfortable stroll, a 30 to 36-inch width would suffice, but for wheelchair accessibility, it should be at least 48 inches.
Lastly, decide on the style – raised paths (walls), indented paths, flat paths with markers, etc. Your style choice would depend upon your available resources and preferred aesthetics. However, raised paths or walls usually provide clearer guidance and a more profound sense of journey during meditation.
Designing and scaling your labyrinth thoughtfully makes the whole process of building much smoother, setting you up for success from the start.
Creating the Base: How to Mark Exterior Dimensions
When your site is ready, the first practical step is to mark the exterior dimensions of the labyrinth. Begin with the overall diameter you want your labyrinth to have. Using a long string attached to a stake at your chosen central point, you’re essentially creating a giant compass. Depending on the size of your labyrinth, you might be marching several steps away, so be sure you have ample room.
Walk a complete 360-degree circle around your central stake, marking out your perimeter with landscaping paint, chalk or a shallow trench.
Align your entrance with a compass point, usually north or east depending on personal preference or geographical constraints. From this point, begin to establish the dimensions of your path. Generally, a path width between 18 to 36 inches is comfortable for walking. Once you’ve decided, stick to it consistently throughout the whole labyrinth for continuity and flow.
At the same time, consider your path’s separation. This is the gap between the circuits in the labyrinth. Typically these should fall in the same range as your path width.
Keep a note of these measurements as they form the foundation for your labyrinth. Remember, patience and precision at this stage will ensure the success of your project.
Constructing the Path: Mark Every 16″ Along the Edges
Remember, accuracy is crucial in creating a labyrinth. Equally spacing the path at 16-inch intervals ensures a consistent walking experience. With a tape measure, carefully measure and mark every 16-inches along the edge of your labyrinth. This systematic measuring aids in producing a clear path and enhances the overall look and feel.
These sequential markers will serve as a practical guide when you initiate the process of chiseling the path. By paying attention to these points, you’re setting the groundwork for a smoother construction journey.
The act of measuring and marking not only consolidates the physical structure of your labyrinth, but it also reflects the mindfulness that goes into its creation. Like meditation, this process requires patience, attention to detail, and deliberate intention.
Remember to approach each step consciously, enjoying the tranquility that comes from being fully present in the moment – and never rush the process; after all, the journey is equally as significant as the destination.
Using Cord to Create a Structured Grid
To form the foundation of your labyrinth, you’ll require some cord. Here are some important steps to follow:
1. Select a cord that is both strong and visible against the ground. The cord allows you to “draw” your intended layout before committing.
2. Measure and cut the cord equal to the radius of your labyrinth. Attach one end to the center stake and the other end to a piece of chalk or a marker.
3. Gently pull the cord taut and walk in a circle, drawing the outer border of your labyrinth.
4. Repeat the process, drawing inner concentric circles to represent the various pathways within your labyrinth.
The resulting grid will serve as a blueprint, helping maintain a balanced and harmonious shape as you begin construction.
Determining and Marking Grid Coordinates for Accuracy
To secure the precision of your labyrinth design, it is crucial to determine and mark grid coordinates accurately. This methodology ensures the labyrinth is symmetrical and harmonious in appearance.
First, you’ll want to start by finding the midpoint on your outline and marking it as your central point. This acts as the compass, guiding the formation of your labyrinth’s pathways.
Next, draw straight lines from this central point to the outer edge at several points. You may find it useful to envision these as rays emanating from a sunrise. This step creates identifiable sections within your labyrinth.
The next phase involves dividing your sections again, creating smaller, more detailed subsections. It is instrumental in installing more intricate pattern designs, if desired. Precision here is key – a single error can throw off the entire symmetry.
To ensure your coordinates align correctly, aim to mark your intersections every few inches to create a grid. Use temporary yet visible markers, like chalk or string, so that adjustments can be made if needed.
Remember, achieving an accurate grid layout is pivotal in creating a well-aligned labyrinth. This process might be time-consuming, but the result will be well worth it!
Starting the Build: Hammering the First Stake
To initiate construction, identify the center point of your labyrinth where the very first stake will be hammered into the ground. This stake serves as the crux of your entire labyrinth and all other coordinates will be marked in relation to it.
Here are some keypoints to consider:
- 1. Choose a stake that is long enough and sturdy enough to remain firmly in the ground. It will need to withstand the rigors of construction.
- 2. Using a mallet or a heavy hammer, drive the stake into the ground until only a few inches are visible. This will ensure stability.
- 3. The stake should be placed at the exact center of your labyrinth.
- 4. Double-check and confirm the positioning. Adjustments after subsequent stakes are driven in would be quite challenging.
This small yet significant step lays the groundwork for the intricate network of paths that make up your labyrinth. Make sure it is done correctly as it sets the stage for the next steps in your construction process.
Progressing the Build: Locating Intersections and Hammering Additional Stakes
As you’re moving forward with your labyrinth project, the next step involves identifying where your paths will intersect. Utilizing your scaled layout will be pivotal here. Look for points where the corded lines crisscross on the grid. These spots will serve as the crossroads in your labyrinth, so accuracy is vital to maintaining a balanced design.
Next up is hammering stakes at each intersecting point. This might seem a bit labor-intensive, but remember, each stake you drive marks the cornerstone of your peaceful pathway. The stakes provide the framework for your labyrinth and shape its unique twists and turns. Drive them firmly into the ground to ensure stability.
If the stakes don’t all line up perfectly, don’t worry! Labyrinths are never perfectly symmetrical, and that’s part of their charm. The unevenness adds a certain character, making your labyrinth distinctively yours. Just keep your eyes on the planned layout to ensure you aren’t straying too far from your original design.
During this process, keep your breath steady, reminding yourself to stay in the present moment. This will double the process as a meditation practice intertwined with manual labor. After all, the mindfulness that comes from the act of creation is part of the joy of building your own labyrinth.
Dealing With Twists in Your Labyrinth Design
When creating turns in your labyrinth, careful planning is key. Plot these twists on your design with precision.
The angles of the turns should be plotted along the lines of the radius. A straightedge or carpenter’s square can help to ensure accuracy during this process.
Transposing these angles onto your actual build can be done using stakes and cord. Maintaining the flow is crucial – the twists should be maneuverable and not too sharp.
This enables a seamless meditation experience as one navigates through the labyrinth.
How to Refine Curves for a Smooth Labyrinth Walkway
Through careful attention to your labyrinth’s layout, create a fluid experience for meditators. Here are some tips to get that smooth walkway.
1. Begin by visualizing the flow. Visualization enhances intention and paves the way for a refined path.
2. Patiently curve your stakes. Each stake is a contour line on your labyrinth’s canvas. Use your hammer to softly bend the stakes into the desired curve.
3. Take a step back often to check your work. A periodic view from a distance gives a better perspective and helps maintain symmetry.
4. Use string to draft the arcs. With your stakes in place, wind string around them to see your path’s shape. Adjust as necessary before finalizing the curve.
5. Integrate natural elements. Incorporate trees, rocks, or undulations of the land. Nature invariably adds subtle curves and enhances the sense of mindfulness.
Remember, refining curves in your labyrinth is not solely about aesthetics. The smoother the curve, the more meditative the experience will be.
Removing Grid Lines for a Clean Finish
After successfully hammering all the stakes and achieving the desired labyrinth design, the next stage involves eliminating the cord grid lines. This process is relatively straightforward but needs careful handling to maintain the integrity of the created shape.
1. Begin at the labyrinth’s entrance and gently unwind the cord wrapped around each stake to retain the labyrinth’s shape.
2. While dealing with the center of your labyrinth or intricate areas, consider using a pair of scissors or a utility knife to cut the cord. However, ensure you maintain a firm grip on the remaining cord to not disrupt the stakes’ alignment.
3. Exercise patience during this stage, taking one section at a time to prevent tangling or cutting of cords needed to outline the labyrinth structure.
4. If certain stakes come loose during this process, gently hammer them back into place while keeping the cord’s tension, to maintain the labyrinth’s form.
While relatively simple, the attention to detail during this step significantly influences the labyrinth’s final appearance, thus requiring a steady hand and a vigilant eye.
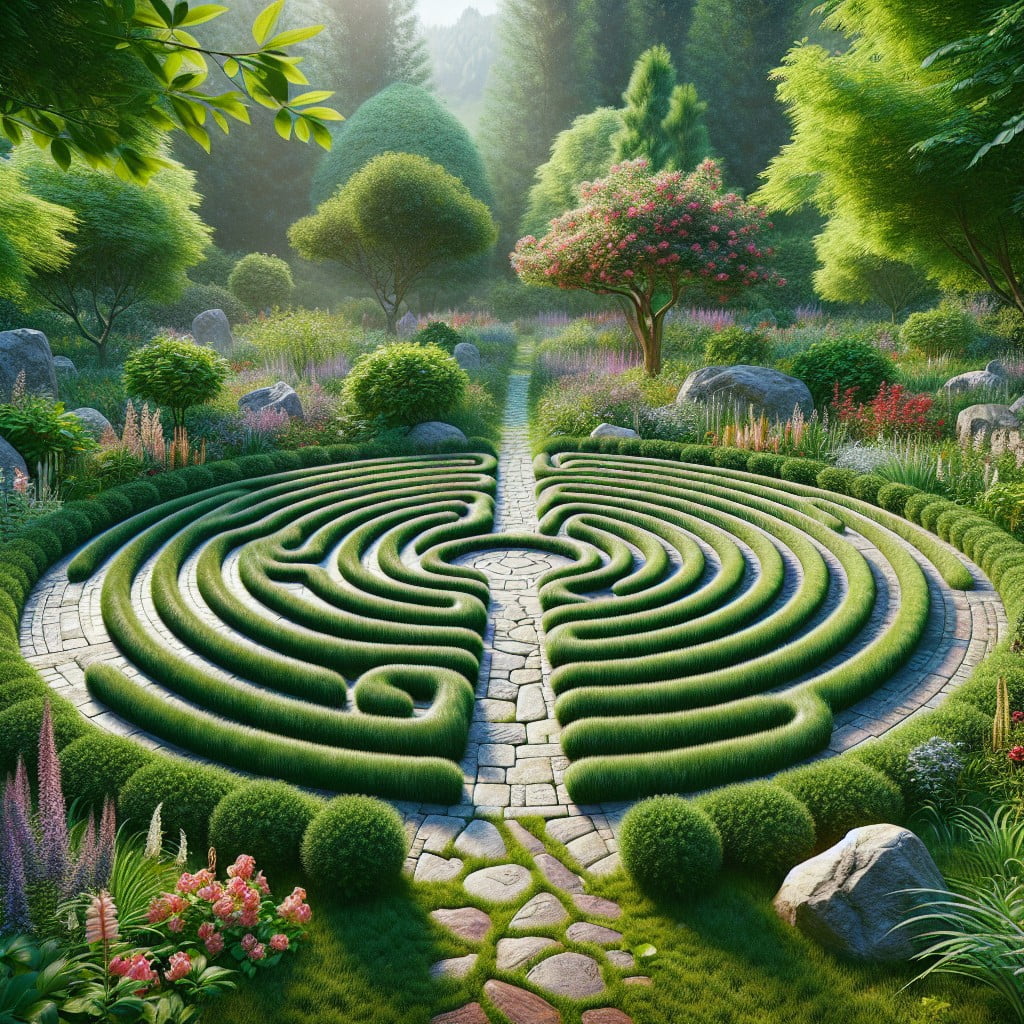
Walking Through Your New Meditation Labyrinth
Take the initial step into your labyrinth mindfully, tuning into your senses, noticing the crunch of stone underfoot, the scent of the earth, the feel of the breeze, and the visually defined path ahead. Follow this curvilinear path at a pace that feels comfortable and unhurried, allowing the design of the labyrinth to guide you inward towards the center.
Each winding step can serve as a cue to let go of daily stressors and plunge deeper into the voyage of self-awareness.
As you reach the center, it is typical to pause for reflection, to receive clarity or a sense of calm. This center, often regarded as a metaphor for your inner self, invites moments of stillness and tranquility.
The journey outwards, similarly, is a continuation of the journey, a gentle transition towards the external world again, empowered with refreshed insight and peace.
Be aware that each walk through your labyrinth may provide a unique experience, as it offers an open canvas for your thoughts, emotions, and experiences to dance upon. The joy resides in the labyrinth’s objective: to encourage your mind to quieten, your heart to open, and your soul to find rest and rejuvenation.
The Therapeutic Advantages of a Meditation Labyrinth
Walking through a labyrinth has been found to induce a meditative state, stimulating alpha brain wave activity for enhanced relaxation and decreased stress levels. Each step taken centers your mind, anchoring you to the present. This results in a more focused and peaceful mental state, a fundamental aspect of mindfulness.
Furthermore, it stimulates both the right and left hemispheres of the brain simultaneously, encouraging whole-brain activity. This simultaneous stimulation can enhance problem-solving abilities, creativity, and intuition.
A labyrinth can also act as a reflective tool, reinforcing personal growth and self-acknowledgment by visually representing one’s life journey: full of twists, turns, and a purposeful path towards the center – your core being.
Lastly, interacting with a labyrinth can provide cardiovascular benefits akin to light physical exercise and, being outside in nature, facilitates a stronger sense of harmony, balance, and environmental connectivity. Each of these aspects contributes to overall well-being and inner peace.
FAQ
What is a meditative labyrinth?
A meditative labyrinth is a singular, circuitous path used for walking meditation, designed to calm the mind, reduce stress, stimulate creativity, and promote self-reflection, balance, and insight.
How much space do I need for a labyrinth?
For an indoor labyrinth, a solitary walker would require a space of at least 15 feet (4.5 m) in width, while for comfortable walking, running, or group activities, a width of 30 feet (9.0 m) is advisable.
How to do labyrinth meditation?
To perform labyrinth meditation, simply follow the labyrinth path at your own pace, consciously noting your mental and emotional state as you walk without having any specific agenda.
How do you set up a prayer labyrinth?
To set up a prayer labyrinth, choose a specific space, create a circular pattern that weaves to the middle – this pattern can be inspired by various labyrinth designs found online – and dedicate this setup as a place for prayer and reflection, focusing on one, two, or all nine of the least reached people groups depending on your available time, space, and purpose.
Can a meditation labyrinth be created indoors?
Yes, a meditation labyrinth can be created indoors, utilizing a variety of materials to delineate the pathways such as tape, string, or painted lines.
What materials can be utilized in constructing a meditation labyrinth?
Materials used in constructing a meditation labyrinth can range from stones and bricks to sand and painted canvas.
How can one incorporate a labyrinth into a regular meditation practice?
One can incorporate a labyrinth into their regular meditation practice by simply walking the winding path mindfully, concentrating on their breath or a mantra to foster introspection and calmness.